How to Build a Rainscreen for Open-Joint Cladding
New materials make for a water management rainscreen system that drains well and doesn’t telegraph through open-joint siding.
In November of 2019, Dan Morrison, chief editor at ProTradeCraft.com, set out to develop a new video series about construction for extreme climates called “Building Resilience.” The first season focused on a project that doubled the size of a Spanish Colonial residence in Minnesota, which nearly straddles the lines between climate zones 6 and 7, the two coldest in the contiguous 48 states. This article focuses on episode 9 of the 13-part series, which looks at two different rainscreen systems that accommodate the unique exterior cladding design.
Two Types of Cladding
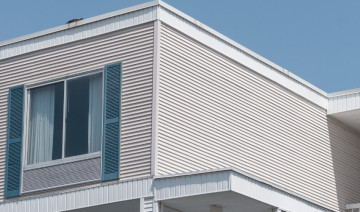
The primary WRB (water-resistant barrier) for the project is R-12 ZIP System sheathing, which combines 2 inches of rigid foam insulation with OSB sheathing. When installed with the foam against the framing, the resin-impregnated sheathing and seam tape provide a continuous air and water barrier around the entire exterior (including the roof). To manage bulk water, the design calls for two different types of cladding, open-joint horizontal PVC boards and large PVC panels (lead image). The two cladding types are used alternately to break up the building’s mass and to provide a contemporary look, and each is installed over a different rainscreen.
As use of rainscreens increases, particularly in wet climates, open-joint cladding is a logical next step. A rainscreen creates a small (minimally ¼- to ⅜-inch) airspace between the siding and the WRB whether it’s housewrap or ZIP System sheathing) that protects the wall in three main ways: it provides a capillary break that prevents wicking of moisture through joints in the cladding; enables gravity drainage of water that gets past the cladding; and promotes drying by introducing airflow behind the cladding.

We still need cladding, of course. Cladding reduces the amount of water the rainscreen needs to handle, and it protects the drainage plane from mechanical damage (from hail, lawnmowers, baseballs, etc.) and degradation through exposure to ultraviolet light. Plus, it adds color, texture and personality. But with a good rainscreen behind it, cladding no longer needs to be continuous. In fact, Michael Anschel, president of OA Design+Build+Architecture, which designed and built the project, believes open-joint cladding performs better because it enables more water to drain faster and it promotes better airflow and drying behind the cladding.
We’ll take a closer look at the cladding itself in a future article. For now, it’s enough to note that the downside of open-joint cladding is that the rainscreen can be seen through the joints, which is not a good look, and more importantly, the rainscreen materials are exposed to ultraviolet light, which causes deterioration over time. Anschel solved both problems here by installing the horizontal open-joint board cladding over Benjamin Obdyke’s UV-protected rainscreen system, which has three components: “Invisiwrap UV” housewrap; HydroFlash UV+” flashing; and “Batten UV” furring strips. All of the materials are resistant to ultraviolet light, and all are black in color, “which will give a beautiful shadow line behind the cladding system,” Anschel says. He also notes that both Invisiwrap-UV and Hydroflash-UV are vapor-open, “which is important in a cold climate. We want to make sure that we’re using the right product behind an open-joint cladding system, which is not going to be a typical WRB.”
The other cladding type uses ¾-inch PVC panels installed over Benjamin Obdyke’s Slicker MAX rainscreen, a meter-wide roll material that combines a three-dimensional matrix with a filter fabric on the outer side. “As the cladding types change, we’re changing our methodology,” Anschel says. “Ultimately we’ll have a ⅜-inch air gap around the entire structure.”
Open-Joint Rainscreen
The rainscreen for the open-joint cladding begins with housewrap installation. The black Invisiwrap-UV comes in rolls about five feet wide and can be installed by one worker using a slap nailer (2). Next come the black polyethylene Batten-UV furring strips, which are fastened to the sheathing in vertical lines 16 inches on center using just enough staples to hold them in place until the cladding is installed. There is no need to align the furring with the studs, which are behind 2 inches of foam, because the sheathing alone will provide enough support for cladding fasteners. Care is taken, however, to align staples vertically so as not to compress the battens. This preserves the structure of the horizontal open cores, which allow for air exchange between vertical bays.
In addition to providing a pleasing shadowline behind the joints in the cladding, the rainscreen system performs a critical function. “For an open-joint cladding system,” Anschel explains, “it is really important that you keep the cladding from being held tight to the building paper. We want drainage back there because water is going to get in.”
3-D Matrix Rainscreen
The SlickerMax rainscreen is installed behind the PVC sheets on all other parts of the house (3). The material’s plastic matrix maintains a uniform ⅜-inch airspace behind the cladding, allowing for easy drainage and air movement in all directions. And because the Batten-UV furring strips also measure ⅜-inch in thickness, the two rainscreen systems are in plane wherever they meet. “We don’t need a solid furring strip to hold our cladding off the building, Anschel explains. “We can have something with lots of holes in it that lets air flow behind it in all directions and still has the ability to resist that compressive strength when I go to put my cladding on.”
As with the Invisiwrap, one worker can install SlickerMax solo, but this time a hammer stapler is the way to go. When working in the air with longer lengths, the material can be cut to length on the ground, which makes for a smaller roll to handle from a ladder.