Avoiding Roofing Errors: Layout Problems, Incorrect Kickout Flashing, and Leaking Metal Flashing
When it comes to keeping water out of a building, fine details matter.
Even a basic asphalt shingle roof should last at least 15 years. Better, laminated shingles will last much longer, and metal or tile roofs can last 40 years or more. I'm not talking about warranty periods. Warranties are hard to make good on and are more often than not useful only as a gesture at the time of sale. I am talking here in broad ranges about the actual time between reroofs. The sad thing is that many roofs last only a few years.
Regardless of the roofing material selected, any roof is only as good as the smallest leak—a clear sign of a roof fail.
Mark Parlee, an exterior contractor whose business has more and more evolved to expert witness and building consulting work, regularly inspects residential roofing and exterior failures and reports on the most common mistakes. Some of these are surprisingly "standard' for even the most basic of roofs. You'd think that the complete omission of, say, drip-edge or step flashings just wouldn't happen with a professional roofing company. Think again.
Here are some of the mistakes Parlee frequently finds:
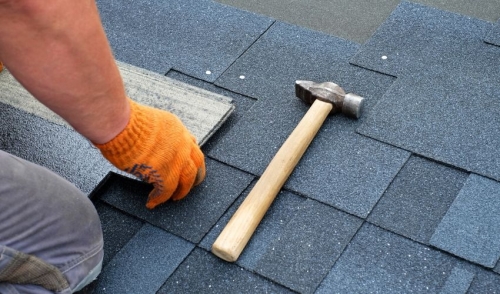
- Layout problems. Shingles frequently have an inadequate offset between courses. Most shingle manufacturers require a minimum 4-inch offset to allow the overlap of shingles to deflect water.
- Nailing problems. Shingles are nailed haphazardly. In many cases, nails were left out entirely, especially at shingle ends, or nails were overdriven or crooked.
- Failure to include any step flashing at all at roof-wall intersections or poor integration of step flashings with the roof shingles.
- Missing drip edge. Omission of drip edge along the gable ends of roofs is most common, but surprisingly, sometimes drip edge is entirely missing from all roof edges. Without a metal drip edge, water will cling by capillary force and leak under the shingles. Unsupported edges are also prone to deterioration from snow, wind, ladders, and foot traffic. (Rare as the latter might be, it's still an issue.)
- No plumbing-vent boots had been installed. Instead, these penetrations are often simply "black jacked"—the bases of the vent pipes smeared with asphalt roof cement.
- No crickets. Too often, the backs of chimneys are not drainable spaces. They collect leaves and other tree debris that further disrupt drainage, leading to accelerated deterioration of the roofing.
- Other penetration problems. All intentional holes in a roof can present problems unless they are meticulously detailed. The best solution is to eliminate them entirely through design. But when they are included, the fact that they are a direct passage into the roof assembly should be cause for utmost care in lapping flashing and cutting roofing accurately to allow water to free drainage around the penetration area.
A more detailed description of these problems can be found in "Common Roofing Errors." In addition, look for Doug Horgan's "Roofing Details That Work," which provides clear guidance and great illustrations to give installers for bullet-proof installations of critical flashings and ice-barrier membranes that can be applied to for any type of steep-slope shingle or metal roof.
Kickouts Are Required
The model building code has required kickout diverters since 2009. In the International Residential Code, it's worded this way: "A flashing shall be installed to divert the water away from where the eave of a sloped roof intersects a vertical sidewall." Still, they are often avoided in replacement work, as we've discussed in this column before (July/August 2019), because roofers are often unwilling to open the siding on the wall to interweave the step flashing and kickout with the weather barrier and roofing.
Mike Guertin, who teaches roofing techniques at JLC Live in both Providence, R.I., and Portland, Ore., provides the most comprehensive training on getting kickouts right available anywhere. Nothing beats the in-person, interactive training experience, but a close second can be found online by searching "JLC + Mike Guertin + kickout training" to find "Kickout Flashing: Required by Code, Yet Often Overlooked."
To be effective, a kickout flashing has to be layered with the weather barrier, drip edge, roofing, and siding without creating any reverse laps. Mike's process is super redundant, even including laps with framing and trim, and in any replacement scenarios, his process will have to be adapted. But if the installation doesn't interweave peel-and-stick and the kickout diverter with the weather barrier and drip edge, it's bound to fail. And the only way to succeed with it is by removing siding (and, of course, removing roofing and any existing drip edge or step flashing, but I am assuming here that is a given on any reroof).
Low-Slope Roofing
Low-slope roofs are more common in some residential markets than others, but they are increasingly a fact of life for replacement contractors working on both modern- and traditional-design homes.
Perhaps the biggest boon for this work has been the advent of TPO (thermoplastic polyolefin) roofing, which is increasingly used on residential projects because it is incredibly durable and relatively foolproof to work with, once an installer masters the heat welding for seams. It also is relatively impervious to pollution and traffic and is not encumbered by the environmental issue that plagues hot-mop asphalt.
Regardless of the roofing membrane, the most common problems with any low-slope roof occur either at perimeter edges or at roof-wall intersections. The main issues Doug Horgan, the head of building science at BOWA, a high-end Washington, D.C.-based remodeling firm, finds often involve metal flashings that leak at joints. Metal changes size significantly over the seasons, which puts a lot of stress on the joints. The best way to keep water out along the roof perimeter is to run flexible roofing materials under the metal and down the vertical surface. The key at walls is to prevent water from getting behind the roofing material. It seems obvious, but often the leaks are through the wall above the roof-wall intersection. But as a replacement roofer, you're stuck managing this water.
With stucco or any surface cladding, there's usually a drainage plane buried behind the cladding. It's critical to lap the drainage plane material (typically a weather barrier) onto the new roofing.
With solid masonry walls, it's enough to secure the roofing membrane with a termination bar and counterflash with metal let into a mortar joint above the membrane. This works because solid masonry will absorb the water and release it (by drying) once the sun comes out. Solid masonry walls are incredibly resilient.
The same is not true for brick-veneer walls. Water regularly is absorbed into the veneer, draining through the air space behind the brick, and can easily leak down past the roof-wall intersection. The only way to adequately manage the water is with a through-wall flashing that collects the water draining through the cavity and directs it out through weep holes. Few replacement roofers are equipped to take on the retrofit of the through-wall flashing. the best you can do is align yourself with a good mason who can take on this work, and direct your client to him or her. What you do not want to do is install a simple let-in flashing, pretending this will work. That flashing will likely fail, leaving you with the liability.