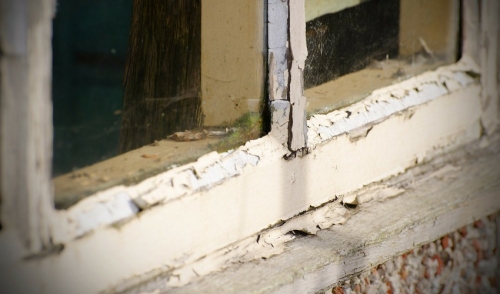
Repairing Rotted Window Sills
Window sills take quite a beating. Constant exposure to the sun, rain and ice can take a toll, especially when water finds its way beneath the layer of paint and caulk. Ongoing exposure to moisture can cause the sill to rot, a process that only gets worse over time. If left unchecked, the rot will penetrate deeper into the sill, requiring more and more extensive repair, often spreading to adjacent jams and trim-work.
The good news is that repair isn’t too difficult, especially if performed early enough. If the rot is confined to just a small area, a simple patch and fill is all that is needed. For larger sections of damage, most or all the sill should be removed and replaced.
Check to see how extensive the rot has become. You’ll have to remove any rotted material, so if it extends to the window trim, cut out any rot you see there as well. It is best to make a clean cut at the edge of where the damage is, thus leaving an even surface of hard wood to work with. If the damage runs along the entire front of the sill, it may be necessary to cut the sill off, leaving it flush with the siding. A circular saw will work well for this.
To repair a small section, first scrape away any remaining paint and caulk from the affected area Dig way the rot and tighten up the remaining wood with a wood hardener. Once the surface is prepared with a hardener, use a two-part epoxy wood filler next, such as Minwax High Performance Wood Filler to either fill small areas completely or to build up the surface enough to attach a new sill or piece of trim. If you had to remove the sill flush to the siding, do the following:
- Apply hardener and fill gaps with the epoxy filler to create an even surface for the replacement sill.
- Sand or plane any high spots to make your surface flush.
- Next, select a rot resistant wood such as cedar, or consider using a solid piece of PVC that matches the thickness of the sill and cut to the desired length. Match the angle of the sill slope along the back edge of your replacement piece (usually 15%).
- Drill pilot holes across the front of your replacement sill, all the way through (about every 12 inches).
- Apply a bead of waterproof adhesive to the exposed edge of the prepared surface.
- Attach the replacement sill onto the adhesive and fasten in place with 3 ½ inch deck screws. Make sure the screw heads are countersunk at least a quarter inch below the surface.
- Plane or sand any high spots along where the new and old sills meet, fill any gaps and screw holes with wood filler.
- Sand the wood filler once dried, prime and paint to match.
As with any repair project, we’re here to help. Just stop in or give a call and we’ll be happy to answer any questions you have about window sill repair or any other project you’re working on.
